
Safety 1st Gate Manual: A Comprehensive Guide
Navigating childproofing requires informed choices; this manual details Safety 1st gates, covering installation, safety features, troubleshooting, and maintenance for optimal protection.
Understanding Safety 1st Gates
Safety 1st gates are crucial components of a comprehensive childproofing strategy, designed to restrict access to potentially hazardous areas within the home. These gates aren’t merely barriers; they represent a proactive approach to infant and toddler safety, preventing falls down stairs, access to pools, or entry into rooms containing dangerous objects.
Understanding the core function is paramount. Safety 1st offers a diverse range of gate designs, each engineered with specific installation methods and safety features. Familiarizing yourself with these variations – pressure-mounted, hardware-mounted, and auto-close mechanisms – is essential for selecting the most appropriate gate for your specific needs and doorway configuration.
Furthermore, recognizing the importance of adherence to OSHA regulations, even within a domestic setting, highlights the commitment to safety standards. While not directly governed by OSHA in a home environment, the principles of hazard communication and workplace safety translate to creating a secure environment for children. Regular inspection and maintenance, as outlined in this manual, are vital for ensuring continued effectiveness.
Types of Safety 1st Gates Available
Safety 1st offers a broad spectrum of gate solutions tailored to diverse household layouts and safety requirements. Pressure-mounted gates, ideal for doorways and hallways, utilize tension to remain in place, requiring no permanent alterations to the structure. These are easily moved and adjusted, offering flexibility.
Hardware-mounted gates, conversely, provide a more robust and permanent safety barrier. Secured directly to the wall with screws, they are particularly suitable for top-of-stair installations or areas demanding heightened security. Auto-close gates, a popular choice, feature a spring mechanism that automatically swings shut, preventing accidental openings.
Beyond these core types, variations include extra-wide gates for larger openings, and gates with one-hand operation for parental convenience. Understanding these distinctions, and considering factors like doorway width, stair proximity, and desired level of permanence, is crucial for selecting the optimal Safety 1st gate. Prioritizing security, as highlighted in electrical safety partnerships, is paramount;
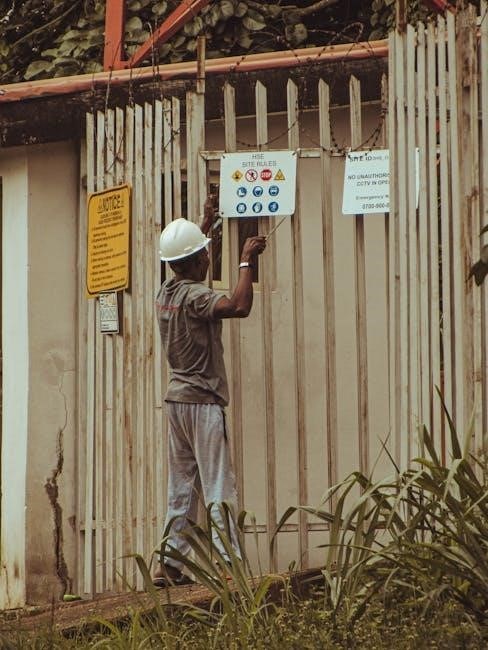
Installation Process: General Guidelines
Prior to installation, carefully review all included instructions and identify all components. Ensure the chosen gate is appropriate for the opening’s width and the surrounding structure. Thoroughly inspect the mounting surfaces – walls or doorframes – for stability and integrity; damaged surfaces require repair before proceeding.
Accurate measurement is critical; utilize a measuring tape to confirm the gate’s fit within the designated space. For pressure-mounted gates, ensure the walls are parallel and capable of withstanding the applied pressure. Hardware-mounted installations necessitate locating wall studs for secure anchoring, potentially requiring a stud finder.
Always prioritize safety during installation, following OSHA guidelines for workplace safety. Double-check all connections and fasteners, ensuring they are tightened securely. Regularly inspect the gate post-installation, mirroring the principles of hazard communication regarding material integrity. A properly installed gate is a foundational element of a safe environment.

Mounting Options: Pressure-Mounted vs. Hardware-Mounted
Safety 1st gates offer two primary mounting methods: pressure-mounted and hardware-mounted, each suited to different situations; Pressure-mounted gates utilize adjustable spindles to create tension between opposing walls, requiring no permanent modifications. These are ideal for temporary installations or rentals, offering convenient portability, but are less secure for active climbers.
Hardware-mounted gates, conversely, involve screwing the gate directly into wall studs or doorframes, providing a significantly more robust and permanent solution. This method is recommended for top-of-stairs or high-traffic areas where stability is paramount. Installation demands greater precision and may leave visible holes upon removal.
Consider the surface material and structural integrity when selecting a mounting option. Always adhere to workplace safety standards, ensuring proper anchoring techniques. Prioritize driver safety by avoiding gate placement that obstructs emergency exits. Understanding these distinctions is crucial for optimal safety and compliance.
Pressure-Mounted Gate Installation
Installing a Safety 1st pressure-mounted gate begins with verifying the opening’s width falls within the gate’s adjustable range. Extend the side spindles, ensuring they securely contact the opposing surfaces. Apply firm, even pressure until the spindles lock into place, indicated by a clicking sound or visual marker.
Regularly inspect the spindles for slippage, especially after initial installation and during routine use. Avoid excessive force when opening or closing the gate, as this can compromise the pressure mounting. Remember, these gates are not suitable for top-of-stairs applications due to potential instability.
Prioritize hazard communication by ensuring all household members understand the gate’s operation and limitations. Maintain a regular inspection checklist to identify any loosening or damage. Proper installation, coupled with diligent maintenance, maximizes the gate’s effectiveness in preventing accidents and promoting a safe environment.
Hardware-Mounted Gate Installation
Securely installing a Safety 1st hardware-mounted gate demands precision. Begin by marking drill points on both sides of the opening, ensuring accurate alignment. Drill pilot holes, then attach the mounting cups using the provided screws – confirm they are firmly fastened to the wall studs for maximum stability;
Attach the gate to the mounting cups, verifying a snug fit and proper latching mechanism. Regularly inspect the screws for tightness, as vibrations can cause loosening over time. Hardware-mounted gates are ideal for top-of-stairs or irregular openings where pressure mounting isn’t feasible.
Prioritize workplace safety by using appropriate personal protective equipment during installation. Understand material safety data sheets for the gate’s components. A correctly installed hardware-mounted gate provides a robust barrier, enhancing child safety and peace of mind, especially in high-risk areas.
Safety Features of Safety 1st Gates
Safety 1st gates prioritize child security through multiple innovative features. The robust construction utilizes durable materials, minimizing potential hazards. A key element is the one-hand operation mechanism, allowing quick and easy access for adults while remaining secure against a child’s attempts to open it.
The automatic closing feature ensures the gate reliably shuts behind you, preventing accidental openings. Furthermore, the double-locking system provides an extra layer of protection, particularly crucial for top-of-stairs installations. These features collectively create a dependable barrier.
Adhering to OSHA regulations and promoting driver safety are paramount. Hazard communication regarding gate materials ensures informed use. Regular inspection, as part of a comprehensive safety program, verifies continued functionality. These gates are designed to meet stringent safety standards, offering parents confidence and peace of mind.
One-Hand Operation Mechanism
Safety 1st gates excel in convenience with their intuitive one-hand operation. This feature is designed for parents who often have their hands full, enabling swift and secure gate management. The lever-style handle allows adults to easily release and operate the gate with a single hand, a crucial benefit in busy households.
The mechanism’s design prioritizes safety; it requires a deliberate action to open, preventing accidental disengagement by a child. It’s engineered to be firm yet accessible, striking a balance between security and usability. This functionality aligns with workplace safety principles, offering a quick response in potentially hazardous situations.
Regular inspection of the mechanism is vital to ensure smooth operation. Maintaining this feature contributes to overall gate reliability and reinforces a safe environment. Proper function is essential, mirroring the importance of driver safety training and hazard communication regarding gate components.
Automatic Closing Feature
A standout safety element of many Safety 1st gates is the automatic closing function. This feature ensures the gate reliably returns to a locked position after passage, minimizing the risk of leaving a hazardous opening unattended. It’s a proactive safety measure, reducing reliance on manual closure and preventing potential accidents.
The mechanism typically utilizes a spring-loaded hinge, carefully calibrated to provide consistent and controlled closing. This design aligns with OSHA regulations emphasizing preventative measures in workplace safety, creating a secure barrier. It’s crucial to verify the spring tension periodically to maintain optimal performance.
Proper installation is paramount for the automatic closing feature to function correctly. Obstructions or improper alignment can hinder the mechanism. Like driver safety training, consistent functionality is key. Regular checks, alongside general maintenance, ensure this vital safety component remains effective, contributing to a secure home environment.
Double-Locking System
Safety 1st gates frequently incorporate a double-locking system, representing a significant enhancement to childproofing security. This dual-action mechanism requires two distinct motions to open the gate, preventing accidental or single-handed operation by children. It’s a critical layer of defense, exceeding basic latching systems and bolstering overall safety.
The system typically involves releasing one lock, then manipulating a second, separate mechanism – often a button or slider – to fully disengage the gate. This complexity mirrors the layered approach to hazard communication standards, ensuring multiple safeguards are in place. It’s designed to deter determined toddlers while remaining manageable for adults.

Regularly test the double-locking system to confirm both components function smoothly and securely. Like workplace safety programs, consistent verification is essential. A malfunctioning lock compromises the gate’s effectiveness. This feature, combined with proper installation, contributes to a robust barrier, aligning with OSHA’s emphasis on proactive safety measures and preventing potential incidents.
Troubleshooting Common Issues
Even with careful installation, occasional issues may arise with Safety 1st gates. Addressing these promptly is crucial for maintaining a secure environment. Common problems include latching difficulties, operational stiffness, and instability – mirroring challenges found in workplace hazard communication. A gate that doesn’t function correctly offers a false sense of security.
If the gate won’t latch, first inspect for obstructions. Ensure the latching mechanism aligns perfectly with the receiver. Check for debris or damage. For a difficult-to-open gate, lubrication may help; however, avoid excessive force. Instability often stems from improper mounting or uneven pressure. Re-evaluate the installation, ensuring it’s level and secure.
Remember, consistent inspection – akin to a regular OSHA safety checklist – is key. Don’t attempt repairs beyond your skill level; contact Safety 1st support or a qualified professional. Prioritizing safety, like driver safety training, means addressing concerns immediately to prevent potential accidents and maintain a reliable barrier.
Gate Won’t Latch
A Safety 1st gate failing to latch is a significant safety concern, demanding immediate attention – similar to addressing a hazard communication issue in a workplace. This often indicates misalignment or an obstruction preventing proper engagement of the locking mechanism. Begin by visually inspecting the latch and receiver for any visible debris, such as dust, dirt, or small toys.
Carefully check the gate’s alignment within the opening. Ensure it’s square and hasn’t shifted, potentially due to pressure or uneven flooring. Gently try to manipulate the gate to see if a slight adjustment allows the latch to catch. If the latch appears damaged, do not force it; replacement is necessary. Remember, a compromised latch defeats the gate’s purpose.

Consider whether the gate was installed correctly in the first place, referencing the installation manual. Like driver safety training emphasizes preventative measures, ensuring proper installation minimizes future latching problems. If issues persist, consult Safety 1st’s support resources or a professional installer.
Gate is Difficult to Open
Encountering difficulty opening a Safety 1st gate can be frustrating and potentially dangerous, especially in emergency situations – mirroring the urgency of responding to a general fire safety hazard. Often, this stems from the gate’s locking mechanism or the pressure exerted by the mounting system. First, verify the one-hand operation mechanism is functioning correctly; it should release smoothly with minimal effort.
Inspect the hinges and mounting hardware for any signs of binding or corrosion. Lubricating these components with a silicone-based spray (avoiding oil-based products) can often resolve the issue. Ensure nothing is obstructing the gate’s swing path, like rugs or furniture. Like workplace safety programs require regular inspection, check for loose screws or damaged parts.
If the gate is pressure-mounted, excessive pressure can make it hard to open. Try slightly adjusting the tension. If it’s hardware-mounted, ensure the screws are securely tightened but not over-tightened, which can also cause resistance. If problems persist, consult the manual or contact Safety 1st support.
Gate is Unstable
An unstable Safety 1st gate compromises its protective function, demanding immediate attention – similar to addressing hazard communication regarding gate materials. Instability typically arises from improper installation, uneven mounting surfaces, or damaged components. Begin by meticulously re-examining the installation process, ensuring adherence to the manual’s guidelines.
For pressure-mounted gates, verify the gate is firmly pressed against both surfaces and that the pressure indicators are within the acceptable range. Like driver safety training emphasizes secure vehicle operation, ensure the gate isn’t leaning or wobbling. Hardware-mounted gates require checking that all screws are tightened securely into wall studs or using appropriate anchors.
Inspect the gate frame and mounting hardware for cracks, bends, or stripped screws. If damage is detected, replace the affected parts immediately. Regular inspection, akin to OSHA regulations, is crucial. If the instability persists despite these checks, discontinue use and consult Safety 1st’s customer support for guidance.
Maintenance and Cleaning
Consistent maintenance extends the lifespan and effectiveness of your Safety 1st gate, mirroring the importance of workplace safety programs like lockout/tagout. Regular checks – a ‘regular inspection checklist’ – are paramount. Inspect all components monthly for signs of wear, damage, or loose hardware, similar to hazard communication regarding material integrity.
Cleaning should be performed routinely with a mild soap and water solution. Avoid abrasive cleaners that could damage the gate’s finish or components. Like ensuring a safe work vehicle, keep the gate’s moving parts free from debris to ensure smooth operation. Pay particular attention to the latching mechanism and hinges.
After cleaning, thoroughly dry all parts before reassembling. Following cleaning procedures prevents corrosion and maintains functionality. Periodically lubricate moving parts with a silicone-based lubricant, avoiding oil-based products that can attract dirt. Remember, proactive care, like driver safety training, prevents potential hazards and ensures continued safety.
Regular Inspection Checklist
A thorough inspection is crucial for maintaining gate safety, akin to OSHA regulations ensuring workplace health. Monthly, verify the mounting hardware – screws, brackets – are securely tightened, mirroring the commitment to work vehicle safety. Check for any signs of rust or corrosion, addressing them promptly, similar to hazard communication regarding material degradation.

Inspect the gate frame for cracks or bends. Test the latching mechanism repeatedly to ensure it functions smoothly and securely, like confirming a double-locking system’s effectiveness. Examine the hinges for proper alignment and smooth operation. Ensure the automatic closing feature (if applicable) operates correctly and isn’t obstructed.
Verify the gate’s stability – it shouldn’t wobble or easily move when pressure is applied. Document all inspections and any necessary repairs. Like a fire safety hazard assessment, identify potential risks and address them immediately. A consistent checklist, like a workplace safety poster, reinforces diligence.
Cleaning Procedures
Maintaining a clean gate is vital for hygiene and longevity, mirroring OSHA’s emphasis on a safe environment. Regularly wipe down all surfaces – frame, bars, latch – with a mild soap and water solution. Avoid abrasive cleaners that could damage the finish, similar to protecting materials from corrosion identified in hazard communication.
For stubborn stains, a diluted vinegar solution can be effective, but always test in an inconspicuous area first. Ensure the gate is completely dry before use to prevent slipping hazards, akin to driver safety training focusing on vehicle maintenance. Pay attention to the latching mechanism, removing any debris that could impede its function.
Avoid using harsh chemicals or solvents, as these could compromise the gate’s structural integrity. Like a regular inspection checklist, incorporate cleaning into your routine. Document cleaning dates for tracking. Proper cleaning, like a commitment to electrical safety, contributes to a secure environment for children.
Workplace Safety & OSHA Regulations (Relevant to Gate Use)
While primarily for residential use, Safety 1st gates in commercial settings – daycare facilities, for example – fall under OSHA’s general duty clause, requiring a safe environment. Employers must commit to safety, communicating this to all staff, mirroring roadway safety protocols. Regular inspections, like those outlined in a maintenance checklist, are crucial.
Hazard communication standards apply if gate materials contain potentially hazardous substances. Material Safety Data Sheets (MSDS) should be accessible. Training on proper gate operation – latching, one-hand operation – is essential, akin to driver safety training. Ensure gates don’t obstruct emergency exits or fire safety equipment.
Compliance with fire safety regulations is paramount; gate materials shouldn’t contribute to fire hazards. Reporting unsafe conditions is encouraged, mirroring OSHA’s complaint process. Documentation of inspections and maintenance demonstrates due diligence. Prioritizing safety, like implementing lockout/tagout procedures, protects children and staff alike.
Driver Safety Training & Gate Placement
Although seemingly unrelated, principles of driver safety training apply to gate usage, particularly in environments with vehicular traffic – daycare drop-off zones, for instance. Awareness of surroundings is key; gates shouldn’t create blind spots for drivers or pedestrians. Proper placement minimizes risks, avoiding areas prone to collisions or obstructing visibility.
Just as driver training emphasizes hazard recognition, staff must be trained to identify gate malfunctions or improper installations. Regular inspections ensure gates remain secure and functional, preventing accidental openings. Clear signage indicating gate operation – one-hand operation, automatic closing – enhances safety.
Consider gate placement relative to parking areas and pedestrian walkways. Ensure adequate lighting for visibility, especially during nighttime hours. Establish procedures for gate operation during vehicle drop-off and pick-up times. Prioritizing a safe environment, similar to a comprehensive driver safety program, protects children and staff from potential incidents.

Hazard Communication & Material Safety (Gate Materials)
Safety 1st gates utilize various materials – plastics, metals, and fabrics – each with specific safety considerations. Hazard Communication Standards necessitate understanding potential risks associated with these materials. While generally non-toxic, some components may contain small parts posing choking hazards, requiring clear labeling and age recommendations.
Material Safety Data Sheets (MSDS), though not typically provided for consumer gates, outline potential hazards during manufacturing. Gate construction prioritizes durability and resistance to common wear and tear, minimizing material degradation. Regular inspection identifies potential issues like cracking plastic or rusting metal, preventing injury.
Fire safety is paramount; gate materials should meet flammability standards. Avoid placing gates near direct heat sources. Proper disposal of damaged gates prevents accidental exposure to potentially hazardous materials. Understanding material composition and adhering to safety guidelines ensures a secure environment for children.
General Fire Safety Hazards & Gate Materials
Fire safety concerning Safety 1st gates centers on material flammability. Fires require fuel, ignition, and oxygen; gate materials, primarily plastics and metals, contribute as potential fuel sources. While gates aren’t ignition sources, proximity to heaters, fireplaces, or candles dramatically increases risk. Plastics, though durable, can melt and release potentially harmful fumes when exposed to high heat.
Metal components, while less flammable, can conduct heat, potentially igniting nearby combustibles. Fabric components, often found in gate mesh, are generally more flammable than metal or plastic. Maintaining a safe distance between gates and heat sources is crucial. Regularly inspect gates for damage that could compromise their fire resistance.
Ensure clear escape routes aren’t obstructed by gate placement. Consider fire-retardant sprays for fabric components, though effectiveness varies. Prioritize fire prevention and have working smoke detectors nearby. Understanding these hazards and implementing preventative measures safeguards against potential fire-related incidents.