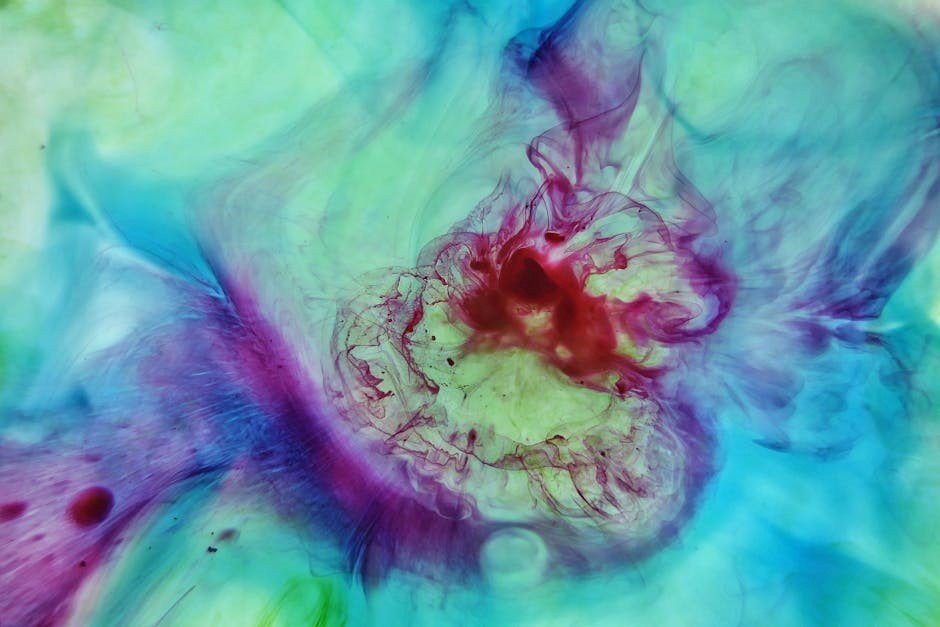
Epoxy resin pigments unlock vibrant artistry! These colorants—liquids, powders, or dyes—transform clear resin into captivating eye candy. Explore diverse effects through careful mixing!
What are Epoxy Resin Pigments?
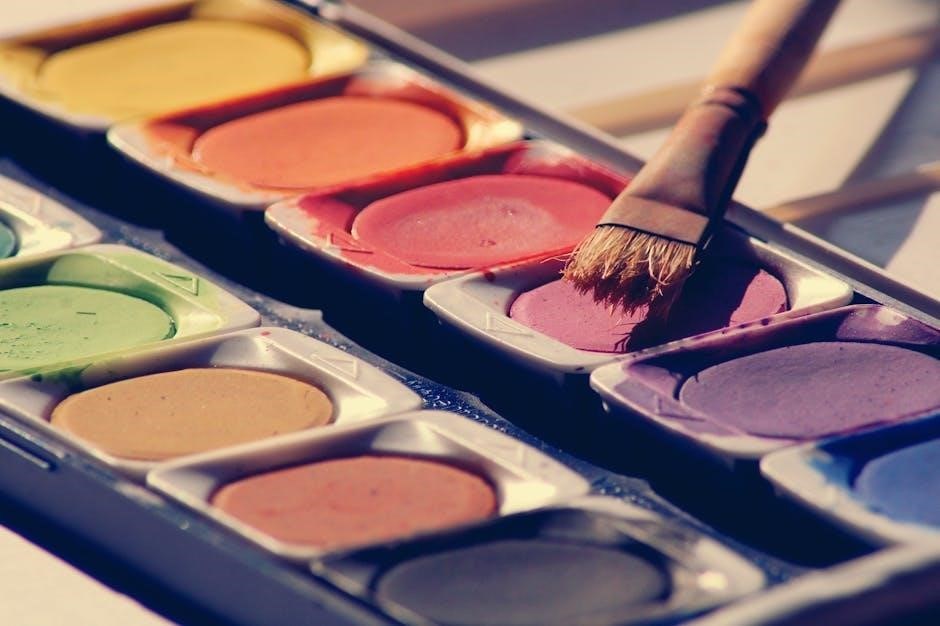
Epoxy resin pigments are essentially colorants designed specifically for use with epoxy resin. They aren’t simply paints or dyes; their formulation considers the unique chemical properties of resin, ensuring proper dispersion and preventing interference with the curing process. These pigments come in a fascinating array of forms – from finely milled powders like mica, to concentrated liquid pigments, and even specialized pastes.
The purpose of adding pigments is to transform clear epoxy into visually stunning creations, often referred to as eye candy. The choice of pigment dramatically influences the final aesthetic, allowing for everything from subtle tints to bold, opaque colors, shimmering effects, and even luminescence. Successful mixing is key to achieving the desired result, and understanding the characteristics of each pigment type is crucial for any resin artist.
Types of Epoxy Resin Pigments Available
The world of epoxy resin pigments offers incredible variety for creating eye candy! Mica powders deliver shimmering, pearlescent effects, adding depth and a luxurious feel. Liquid pigments, including alcohol inks, provide translucent, vibrant colors perfect for swirling and blending. For a dramatic impact, glow-in-the-dark pigments offer luminescent artistry.
Metallic pigments – golds, silvers, and bronzes – impart a sophisticated sheen. Beyond these, specialized pigments include fluorescent options and color-changing varieties. Proper mixing techniques vary depending on the pigment type; powders require thorough incorporation, while liquids blend more readily. Choosing the right pigment is the first step towards achieving your desired resin masterpiece.
Understanding Pigment Categories
Pigment categories—mica, liquid, alcohol ink, metallic, and glow-in-the-dark—each offer unique eye candy effects. Mastering mixing unlocks their full potential in epoxy resin!
Mica Powders: Shimmer and Depth
Mica powders are a fantastic choice for adding incredible shimmer and depth to your epoxy resin creations, truly delivering eye candy effects. These finely ground minerals reflect light, creating a pearlescent or metallic sheen. When mixing, a little goes a long way; start with a small amount and gradually add more until you achieve the desired intensity.
Different grades of mica offer varying levels of sparkle. Experiment with various colors – golds, silvers, bronzes, and vibrant hues – to discover unique combinations. Mica powders blend well with epoxy resin, providing a smooth, even distribution of shimmer. They are particularly effective in creating galaxy-inspired pieces or adding subtle highlights to other resin art projects. Remember to thoroughly stir the mixture to prevent settling and ensure consistent color throughout your piece.
Liquid Pigments: Translucent Colors
Liquid pigments excel at producing beautifully translucent colors within epoxy resin, offering a different kind of eye candy than opaque options. These pigments, often alcohol-based, blend seamlessly with the resin, creating smooth, even tones. When mixing, observe how the color appears – it may look subtle in the container but intensify as it combines with the resin.
They are ideal for achieving a stained-glass effect or layering colors to create depth. Unlike opaque pigments, liquid pigments allow light to pass through, resulting in a luminous quality. Careful mixing is key to avoid streaks or uneven distribution. Start with a few drops and gradually increase until the desired shade is reached, ensuring thorough incorporation for vibrant, translucent resin art.
Alcohol Inks: Vibrant Hues and Swirls
Alcohol inks are a fantastic choice for creating dynamic, swirling eye candy within epoxy resin. These highly concentrated pigments offer incredibly vibrant hues and unique, organic patterns. When mixing, remember that a little goes a long way! Add drops strategically, as they spread rapidly throughout the resin.
Experiment with different application techniques – direct drops, diluted inks, or even blowing the ink across the surface with a straw for mesmerizing effects. Proper mixing ensures the ink disperses evenly, preventing pooling or muddying. Alcohol inks are perfect for abstract art, geode-inspired pieces, and adding a touch of unpredictable beauty to your resin creations.
Glow-in-the-Dark Pigments: Luminescent Effects
Glow-in-the-dark pigments introduce a magical, otherworldly element to your epoxy resin projects, creating truly captivating eye candy! These pigments absorb light energy and release it slowly, resulting in a stunning luminescent glow. When mixing, ensure thorough incorporation for even illumination.
The amount of pigment dictates the glow’s intensity and duration; more pigment equals a brighter, longer-lasting effect. Consider layering with other pigments for daytime appeal, revealing the glow in darkness. Proper mixing is crucial – clumps can diminish the glow. These pigments are ideal for nightlights, jewelry, and artistic pieces designed to enchant!
Metallic Pigments: Gold, Silver, and Bronze
Metallic pigments – gold, silver, and bronze – infuse epoxy resin creations with luxurious shimmer and sophisticated eye candy appeal! These pigments, often finely ground powders, reflect light beautifully, adding depth and dimension. When mixing, a little goes a long way; start with a small amount and gradually increase to achieve the desired intensity.
Proper dispersion is key to avoid settling or streaking. Gentle, thorough mixing prevents clumping and ensures an even metallic sheen. Experiment with layering different metallic shades or combining them with other pigments for unique effects. These pigments are perfect for jewelry, coasters, and decorative art pieces!
Preparing for Pigment Mixing
Safety first! Gather resin, pigments, tools, and protective gear. Select compatible pigments for stunning eye candy, ensuring a smooth mixing process.
Safety Precautions When Handling Pigments
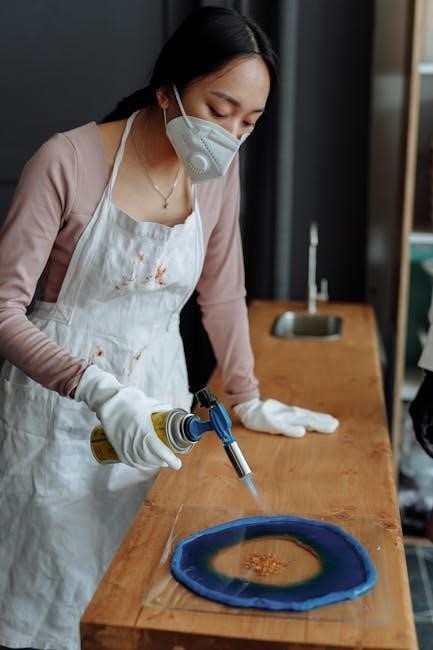
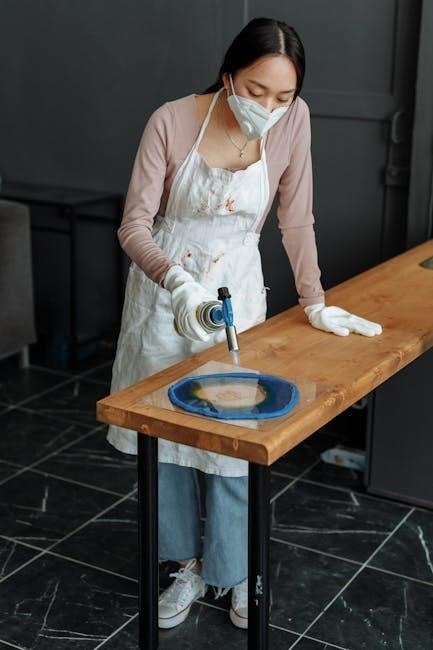
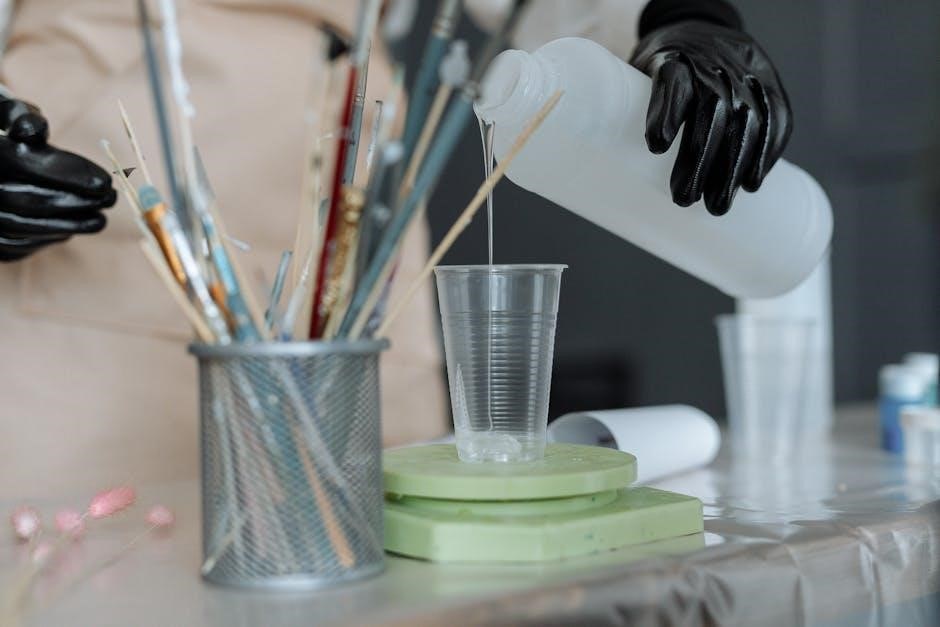
Prioritize safety when working with epoxy resin pigments! Many pigments, especially powders, can cause irritation if inhaled, so always wear a properly fitted respirator or mask. Protect your skin by using disposable gloves – resin and pigments can cause allergic reactions or dermatitis upon contact.
Work in a well-ventilated area to minimize fume exposure. Eye protection, such as safety glasses or goggles, is crucial to prevent pigment particles or splashes from entering your eyes. Keep your workspace clean and free of clutter to avoid accidental spills.
Dispose of used gloves, mixing sticks, and containers responsibly, following local regulations. If pigment comes into contact with skin or eyes, rinse thoroughly with water and seek medical attention if irritation persists. Creating beautiful eye candy shouldn’t compromise your health!
Choosing the Right Resin for Your Pigment
Selecting the correct epoxy resin is vital for achieving stunning eye candy effects with your pigments. Different resins possess varying levels of clarity, viscosity, and curing times, impacting how pigments disperse and appear. For vibrant, translucent colors, opt for a crystal-clear resin specifically designed for art or casting.
If you’re aiming for deep, swirling effects, a slower-curing resin allows more time for manipulation. Consider GlassCast epoxy resins, known for their compatibility with a wide range of pigments and exceptional clarity. Avoid resins with UV inhibitors if you desire intensely bright colors, as these can sometimes dull the pigment.
Always check the resin manufacturer’s recommendations regarding pigment compatibility to ensure optimal results and prevent issues like cloudiness or incomplete curing.
Essential Tools for Mixing Epoxy and Pigments
Creating captivating eye candy epoxy resin art requires specific tools for precise mixing. Begin with accurate digital scales to measure resin and hardener, ensuring correct ratios. Use disposable graduated cups for both components and pigments, simplifying cleanup. Silicone stirring sticks are ideal – they won’t react with the resin and offer flexibility.
For thorough mixing, consider a mechanical mixer (low speed!) to minimize air bubbles. Have plenty of clean, lint-free cloths on hand for spills. Safety is paramount: wear gloves and a respirator, especially when working with powdered pigments. Finally, molds or containers are essential for casting your vibrant creations!

Mixing Instructions: A Step-by-Step Guide
Eye candy epoxy demands precision! Carefully measure resin and hardener, then slowly add pigments while gently stirring for thorough, bubble-free mixing.
Calculating Pigment to Resin Ratio
Eye candy epoxy projects require precise pigment-to-resin ratios for optimal color and curing. Generally, start with 1-3% pigment by weight, relative to the resin volume. For instance, 1 gram of pigment per 100 grams of resin is a 1% concentration.
However, this is a starting point! Vivid, opaque colors necessitate higher concentrations, potentially reaching 5-10%, while translucent effects need less. Always weigh your resin and pigment for accuracy; volume measurements are unreliable.
Test small batches first to gauge color intensity, as pigments vary. Remember, exceeding recommended ratios can hinder proper curing, leading to soft or sticky results. Careful calculation ensures stunning, durable eye candy!
The Importance of Thorough Mixing
Achieving flawless eye candy epoxy relies heavily on meticulous mixing. Insufficiently blended pigment results in streaks, uneven color distribution, and potentially uncured patches. Aim for complete pigment dispersion throughout the resin – no clumps or swirls should remain visible.
Slow, deliberate stirring is key; avoid vigorous agitation that introduces air bubbles. Scrape the sides and bottom of your mixing container frequently to ensure all pigment is incorporated. A 2-3 minute mixing period is generally recommended, but may vary based on pigment type and volume.
Proper mixing guarantees vibrant, consistent color and optimal resin curing, unlocking the full potential of your eye candy creations!
Avoiding Common Mixing Mistakes
Creating stunning eye candy epoxy requires avoiding frequent mixing pitfalls. Overmixing introduces excessive air bubbles, leading to cloudiness and weakened castings. Conversely, undermixing causes streaking and uncured areas, ruining the aesthetic.
Never exceed the recommended pigment load – too much pigment can inhibit curing. Always add pigment slowly, observing color changes. Avoid using contaminated tools, as this introduces impurities. Failing to scrape the container sides leaves unmixed pigment.
Remember, patience and precision are vital. By sidestepping these errors, you’ll consistently achieve professional-quality, vibrant eye candy epoxy results!
Achieving Specific Effects
Eye candy epoxy artistry thrives on technique! Swirls, gradients, and layering—master these with careful pigment control and mixing for dazzling, unique creations.
Creating Solid, Opaque Colors
Achieving truly solid, opaque colors with epoxy resin and eye candy pigments requires a focused approach to mixing. Unlike translucent shades, opacity demands a higher pigment load. Begin by gradually adding pigment to your thoroughly mixed resin, consistently stirring until full color saturation is reached.
Avoid rushing this process; patience is key! Remember that resin often appears darker when wet, so slightly lighter shades are preferable during mixing. Thoroughly combine the pigment to prevent settling and ensure even distribution. For maximum opacity, consider using multiple layers of pigmented resin, allowing each layer to partially cure before applying the next. This builds depth and prevents color bleed-through, resulting in stunning, solid eye candy hues.
Swirling and Marbling Techniques
Swirling and marbling with eye candy pigments in epoxy resin create mesmerizing, organic patterns. Begin by preparing multiple resin mixtures, each tinted with a different pigment. Gently pour these colored resins into your mold, layering or juxtaposing them as desired.
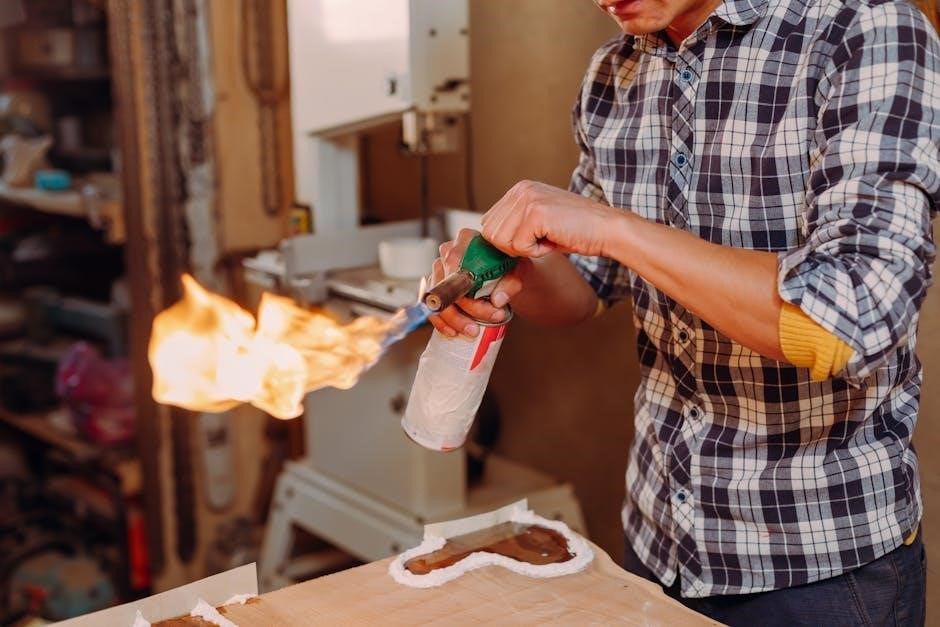
Utilize tools like toothpicks, skewers, or heat guns to manipulate the pigments, creating intricate swirls and veins. Avoid over-mixing, as this will muddy the colors. For a marbled effect, lightly drag a contrasting pigment through the base resin. Experiment with viscosity – thinner resins blend more readily, while thicker resins retain distinct shapes. Remember, practice and a delicate touch are essential for mastering these captivating eye candy techniques!
Gradient Effects with Multiple Pigments
Achieving stunning gradient effects with eye candy pigments requires a nuanced approach to epoxy resin mixing. Prepare a series of resin mixtures, gradually increasing or decreasing the pigment concentration in each. Begin pouring the darkest shade, followed by progressively lighter hues, layering them carefully within the mold.
Gentle manipulation with a heat gun or toothpick can subtly blend the colors, creating a seamless transition. Alternatively, pour all shades simultaneously and slowly tilt the mold to encourage natural blending. Control the gradient’s speed by adjusting resin viscosity and pigment load. Experimentation is key to mastering these beautiful, eye candy inspired gradients!
Layering Pigments for Depth
Layering pigments in epoxy resin is a fantastic technique for creating visually striking, multi-dimensional eye candy pieces. Begin with a base layer of clear resin, allowing it to partially cure before adding subsequent pigmented layers. This prevents unwanted blending and maintains distinct color separation.
Utilize contrasting pigment shades and opacities to enhance the depth perception. Consider incorporating metallic pigments or mica powders in lower layers for a shimmering effect visible through translucent upper layers. Allow each layer to partially set before adding the next, ensuring clean lines and preventing color bleed. Patience and careful mixing are crucial for achieving impressive depth!
Troubleshooting Pigment Issues
Pigment problems? Settling, color shifts, or uneven distribution can occur. Thorough mixing, correct ratios, and quality eye candy pigments are key to flawless resin!
Pigment Settling and Separation
Pigment settling is a common issue, especially with heavier eye candy pigments like metallic or mica powders. Over time, these particles can sink to the bottom of the resin mixture, leading to uneven color distribution. This doesn’t necessarily indicate a problem with the resin or pigment itself, but rather a natural consequence of gravity acting on denser materials.
To minimize settling, ensure extremely thorough mixing during the initial combination of pigment and resin. Utilize a slow-speed mixer to avoid introducing excessive air bubbles, and scrape the sides and bottom of the container frequently. Consider adding a small amount of a flow aid or wetting agent, specifically designed for epoxy, to help keep the pigment suspended.
If settling occurs before pouring, gently re-mix the resin. However, avoid vigorous stirring after the resin has begun to gel, as this can create unwanted bubbles and mar the final finish.
Color Changes After Curing
Noticeable color shifts are frequent when working with eye candy pigments in epoxy resin. What appears vibrant during mixing can sometimes look darker or muted post-cure. This is due to the resin becoming more transparent as it fully hardens, altering light refraction through the pigment.
Certain pigments, particularly reds and yellows, are more prone to this phenomenon. To mitigate unexpected shifts, perform a small test cure with your pigment and resin combination. This allows you to preview the final color before committing to a larger project;
Also, remember that UV exposure can cause fading over time, so a UV-resistant coating is recommended for long-term color preservation. Proper mixing and a test cure are key to achieving predictable results!
Uneven Color Distribution
Achieving consistent color throughout your epoxy resin project requires diligent mixing, especially when using eye candy pigments. Insufficient mixing leads to streaking, marbling where it’s unwanted, or areas with significantly less pigment concentration.
Powder pigments, like mica, are particularly susceptible to settling, demanding extra attention during the mixing process. Ensure the pigment is fully dispersed before pouring. Slow, deliberate stirring is preferable to rapid agitation, which can introduce air bubbles.
Scrape the sides and bottom of your mixing container frequently to reincorporate any settled pigment. A thorough mix guarantees a uniform and visually appealing final result, enhancing your eye candy creations!
Advanced Pigment Techniques
Eye candy pigments thrive with experimentation! Blend types, craft custom shades, and embed 3D objects within epoxy resin for truly unique, artistic depth.
Using Multiple Pigment Types Together
Combining pigment types unlocks spectacular eye candy effects in epoxy resin art. Mica powders introduce shimmering depth, while alcohol inks create vibrant swirls and translucent hues. Metallic pigments, like gold or silver, add luxurious accents.
Experiment with layering: a base of opaque color followed by a mica powder topcoat. Consider the transparency of each pigment; alcohol inks blend seamlessly, but may shift color slightly.
Careful mixing is crucial. Start with small amounts of each pigment, gradually increasing until the desired effect is achieved. Thoroughly incorporate each pigment before adding the next to prevent separation or muddying of colors. Remember, compatibility varies, so test small batches first!
Creating Custom Pigment Blends
Crafting custom pigment blends is key to truly unique eye candy in epoxy resin. Start with a color theory foundation – understanding how hues interact. Combine mica powders for nuanced shimmer, or blend alcohol inks to achieve bespoke gradients.
Experiment with small batches! Keep detailed notes of your ratios – a crucial step for reproducibility. Consider adding a touch of white pigment to pastelize bolder colors. Metallic pigments can elevate any blend with a luxurious sheen.
Thorough mixing is paramount. Ensure each component is fully dispersed for consistent color throughout your resin piece. Don’t be afraid to iterate – the perfect blend often requires refinement!
Incorporating 3D Objects with Pigments
Elevate your epoxy resin creations with embedded 3D objects, enhanced by captivating pigments for stunning eye candy! Consider the object’s material – ensure compatibility with resin. Pre-coat porous items to prevent air bubble formation.
Strategically position objects within the mold, then carefully pour pigmented resin around them. Layering different pigment colors can create depth and highlight the object. Use translucent pigments to allow light to pass through, illuminating the inclusion.
Proper mixing is vital to avoid settling around the object. A slow pour minimizes air entrapment. Remember, patience yields the most visually striking results!
Pigment Compatibility and Resin Systems
Epoxy resin and pigment harmony is key! Always verify compatibility, especially with GlassCast resin, for optimal eye candy mixing and vibrant results.
Compatibility with Different Resin Brands
Epoxy resin formulations vary significantly between brands, impacting pigment acceptance and final eye candy aesthetics. Some resins are designed for optimal color dispersion, while others may exhibit settling or color shifting post-cure. Always conduct small-batch tests before committing to large projects.
Lower-quality resins might not fully encapsulate pigments, leading to uneven distribution or a cloudy appearance. Premium brands, like GlassCast, often guarantee compatibility with their specifically formulated pigments. When using pigments across different brands, start with minimal concentrations and gradually increase, observing for any adverse reactions like incomplete curing or discoloration. Thorough mixing is paramount, regardless of the resin system employed, to ensure uniform color distribution and prevent localized inconsistencies in your eye candy creations.
Working with GlassCast Epoxy Resins
GlassCast epoxy resins are renowned for their clarity and compatibility with a wide range of pigments, making them ideal for creating stunning eye candy effects. Their formulations are specifically designed to maximize color vibrancy and prevent settling, ensuring consistent results.
When using GlassCast, their dedicated pigment range (CULR) guarantees optimal performance and color accuracy. However, high-quality mica powders, alcohol inks, and liquid pigments also integrate beautifully. Careful mixing is still crucial; start with small additions and gradually increase until the desired intensity is achieved. GlassCast’s low viscosity facilitates easy pigment dispersion, minimizing air bubbles and creating flawlessly colored eye candy pieces.
Resources and Further Learning
Online communities and recommended pigment suppliers offer invaluable guidance for mastering eye candy epoxy resin techniques and mixing expertise!
Online Communities and Forums
Engaging with online communities is crucial for epoxy resin artists, especially when exploring eye candy pigments and mixing instructions. Platforms like Facebook groups dedicated to resin art, Reddit’s r/epoxyresin, and specialized forums provide spaces to share creations, ask questions, and learn from experienced crafters.
These communities are treasure troves of knowledge, offering troubleshooting advice for common issues like pigment settling or achieving desired color opacity. Members frequently share their mixing ratios, preferred pigment brands, and innovative techniques for creating stunning effects. Don’t hesitate to post your work for feedback or search existing threads for solutions to your challenges – collaborative learning is key!
Recommended Pigment Suppliers
Sourcing high-quality pigments is vital for achieving vibrant eye candy effects in your epoxy resin projects. Several suppliers specialize in resin-compatible colorants. GlassCast offers a curated range specifically designed for their resin systems, ensuring compatibility and optimal results.
Other reputable options include Black Diamond Pigments, known for their extensive selection of mica powders and metallic pigments, and Just Resin, providing a diverse catalog of liquid pigments and alcohol inks. When selecting a supplier, consider pigment concentration, colorfastness, and customer reviews. Prioritize suppliers offering detailed mixing instructions and support to maximize your creative potential!