Dry pour concrete, also known as dry pack, involves placing a dry concrete mix directly into forms.
This innovative technique offers a compelling alternative to traditional wet concrete pouring methods, gaining traction among DIY enthusiasts and professionals.
April Wilkerson highlights the advantages, while numerous online resources demonstrate successful dry pour applications for slabs, walkways, and more.
What is Dry Pour Concrete?
Dry pour concrete represents a distinct departure from conventional concrete placement, sidestepping the need for on-site mixing with water. Instead, it utilizes a pre-blended concrete mix, typically delivered directly from the bag, and introduces it into the prepared formwork in a completely dry state.
This method, sometimes referred to as “dry pack,” relies on subsequent moisture introduction – often through careful surface application – to initiate the hydration process and achieve the desired hardened state. The technique is gaining popularity, as demonstrated by DIY projects and instructional videos available online.
Unlike traditional wet pours where uniformity of mix is crucial, dry pour concrete demands careful attention to distribution to prevent segregation of cement and aggregate. Proper layering and compaction are vital for a successful outcome, ensuring a strong and durable final product. It’s a method that challenges conventional wisdom about concrete work.
Advantages of Dry Pour Over Traditional Wet Pour
Dry pour concrete offers several compelling advantages over traditional wet concrete methods. A primary benefit is reduced labor, as the elimination of mixing significantly streamlines the process, making it attractive for DIY projects, as showcased in online demonstrations.

Furthermore, dry pouring minimizes waste; precise material placement reduces spillage and the need for extensive cleanup. The method also provides increased control over placement, particularly in confined spaces or for repairs, allowing for targeted application.
Another key advantage is the potential for faster setting times, depending on the moisture application method. While uniformity of mix is a concern, careful layering and compaction can mitigate this. The technique also avoids issues related to weather dependency during mixing, offering greater flexibility.
Common Applications for Dry Pour Concrete
Dry pour concrete is proving versatile across a range of construction and repair applications. A frequently demonstrated use is for concrete slabs, including patios and walkways, as seen in numerous online tutorials detailing the process. Its suitability for smaller projects makes it popular among DIYers.
Beyond slabs, dry pouring excels in step construction, offering a manageable approach for creating durable outdoor steps. Repair work also benefits from this method, allowing for targeted patching of damaged concrete surfaces without extensive formwork.
Furthermore, it’s effectively used for filling holes and creating bases for posts or structures. The technique is also gaining traction for creating thin overlays on existing concrete surfaces, offering a cost-effective renovation solution. Its adaptability makes it a valuable tool for various projects.
Materials Needed for a Dry Pour
Essential materials include concrete mix specifically suited for dry pouring, reinforcement like wire mesh or rebar, and appropriate formwork materials for containing the mix.
Types of Concrete Mix for Dry Pouring
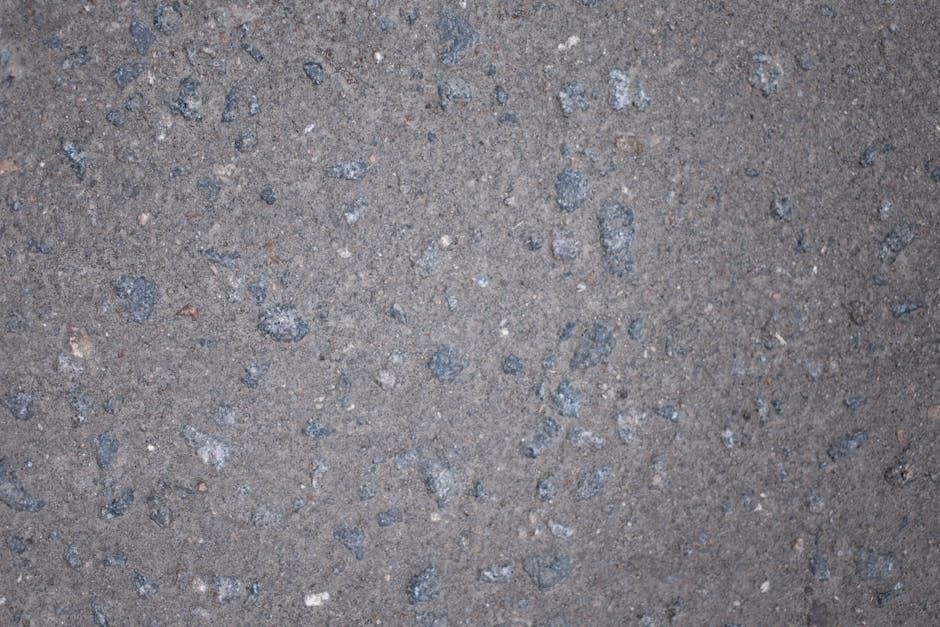
Selecting the correct concrete mix is crucial for a successful dry pour. While standard Portland cement-based mixes can be used, specifically formulated mixes designed for dry applications often yield superior results. These mixes typically contain a blend of cement, sand, and aggregate, optimized for cohesion and minimal segregation when dry.
Many DIYers utilize all-purpose concrete mixes readily available at hardware stores, ensuring they are free of added polymers or air-entraining agents, as these can hinder proper compaction. Some sources suggest using a slightly higher cement content in the mix to enhance binding. It’s important to avoid mixes intended for self-leveling or those with excessive additives.
The key is to choose a mix that allows for effective layering, distribution, and compaction without creating excessive dust or crumbling. Experimentation with different mixes may be necessary to determine the best option for your specific project and local material availability.
Reinforcement Materials (Wire Mesh, Rebar)

Reinforcement is vital in dry poured concrete to enhance its tensile strength and prevent cracking, especially in slabs and walkways. While some smaller projects might forgo it, larger or load-bearing applications necessitate proper reinforcement.
Wire mesh, typically 6×6-10/10, is a popular choice for thinner slabs and walkways, providing distributed support throughout the concrete. It should be elevated slightly above the ground using dobies or chairs to ensure adequate coverage within the pour.
For thicker slabs or areas requiring greater structural integrity, rebar is recommended. A grid pattern of rebar, tied together with wire, offers superior strength. Proper spacing and overlap of the rebar are crucial for effective load distribution. Some sources emphasize the importance of wire lath for optimal adhesion and support, particularly for vertical applications.
Formwork Requirements & Materials
Formwork for dry pour concrete must be robust and meticulously constructed to contain the dry mix during placement and compaction. Unlike wet concrete, dry mix exerts less outward pressure, but secure forms are still essential for maintaining shape and preventing blowouts.
Common materials include lumber (2x4s, 2x6s), plywood, and melamine-coated boards. Plywood should be at least ¾ inch thick for adequate rigidity. Melamine offers a smoother surface, reducing the need for form release agents. Ensure all joints are securely fastened with screws, not nails, to prevent shifting.
Forms must be perfectly level and square. Use a level to verify accuracy before pouring. Bracing is crucial, especially for larger projects, to prevent bowing or collapse. Consider using form release agents, even with melamine, to facilitate easy removal after the concrete has cured.
Preparing the Site for a Dry Pour
Proper site preparation is paramount; excavation and thorough compaction of the subgrade are vital for a stable base.
Accurate formwork installation and precise leveling ensure a consistently even surface for the dry pour.
Excavation and Compaction
Excavation begins with removing topsoil and any organic material, reaching a depth appropriate for your project’s requirements – typically accounting for the concrete’s thickness plus a base layer. Ensure the excavated area extends beyond the planned concrete dimensions to facilitate formwork installation. Following excavation, compaction is absolutely critical.
Utilize a plate compactor or a jumping jack compactor to achieve a uniformly dense subgrade. Multiple passes are essential, especially with granular materials, to minimize settling and ensure long-term stability. Moisture content during compaction is also important; slightly damp soil compacts more effectively than completely dry soil.
Proper compaction prevents cracking and ensures the concrete slab maintains its levelness over time. A well-compacted base distributes the load evenly, reducing stress on the concrete. Inspect the compacted area for any soft spots or inconsistencies and address them before proceeding to the next step. This foundational work directly impacts the durability and longevity of your dry-poured concrete project.
Formwork Installation and Leveling
Formwork construction is paramount for defining the concrete’s shape and ensuring accurate dimensions. Utilize lumber, plywood, or commercially available formwork systems, selecting materials appropriate for the project’s scale and complexity. Securely stake the forms, ensuring they can withstand the pressure of the dry concrete mix.
Leveling is crucial; use a spirit level and laser level to establish a perfectly horizontal plane. Any inconsistencies in the formwork will directly translate into imperfections in the finished concrete surface. Bracing is essential to prevent bulging or shifting during the dry pouring process.
Pay close attention to corners and joints, reinforcing them to maintain structural integrity. Apply a release agent to the formwork’s interior surfaces to facilitate easy removal after the concrete has cured. Double-check all measurements and levels before proceeding, as adjustments become significantly more difficult once the dry concrete is in place. A solid, level formwork is the foundation for a successful dry pour.
Reinforcement Placement
Reinforcement, such as wire mesh or rebar, significantly enhances the concrete’s tensile strength and resistance to cracking. Before the dry pour, carefully position the reinforcement within the formwork, ensuring it’s fully embedded within the concrete’s eventual thickness.
Wire mesh is ideal for slabs and walkways, providing uniform support. Overlap adjacent sheets of mesh by at least one square to create a continuous network. Rebar, on the other hand, is better suited for heavier loads and structural applications, requiring proper spacing and tying to maintain its position.
Use chairs or supports to elevate the reinforcement off the ground, guaranteeing adequate concrete coverage. Proper placement prevents corrosion and maximizes its effectiveness. Ensure the reinforcement doesn’t touch the formwork directly; this can compromise its protective concrete layer. A well-placed reinforcement grid is vital for a durable, long-lasting dry-poured concrete structure;
The Dry Pour Process: Step-by-Step Instructions
Begin by carefully layering and spreading the dry concrete mix, avoiding segregation of cement and aggregate. Compact each layer thoroughly for optimal density.
Layering and Spreading the Dry Concrete Mix
Layering is crucial when employing the dry pour concrete method. Begin by carefully dispensing the dry concrete mix into the prepared formwork, aiming for consistent, even distribution. Avoid dumping large quantities in one spot, as this significantly increases the risk of segregation – the separation of cement from the aggregate.
Spread each layer to a manageable depth, typically between 2 to 4 inches, depending on the overall slab thickness and desired compaction level. Utilize a shovel or rake to meticulously distribute the mix, ensuring it reaches all corners and edges of the form. Pay close attention to preventing the creation of voids or areas with uneven density.
Remember, redistributing dry mix can easily separate particles, so prioritize careful placement from the outset. Consistent layering and gentle spreading are key to achieving a uniform and structurally sound concrete pour. This foundational step directly impacts the final strength and durability of the finished product.
Ensuring Proper Distribution and Avoiding Segregation
Maintaining a homogenous mix is paramount during a dry pour. Segregation – the separation of cement and aggregate – weakens the concrete and compromises its integrity. To combat this, employ techniques that minimize disturbance once the dry mix is placed.
Avoid excessive shoveling or aggressive raking, as these actions promote particle separation. Instead, opt for gentle sweeping motions to distribute the mix evenly. Focus on lifting and shifting the material rather than digging into it.

If you notice areas where the mix appears uneven, carefully add small amounts of concrete mix to correct the imbalance, blending it in gently. Consistent monitoring throughout the spreading process is vital. Remember, redistributing dry mix often separates particles, so initial careful placement is the best preventative measure. A well-distributed mix ensures a strong, durable final product.
Compaction Techniques for Dry Poured Concrete
Unlike wet concrete, dry poured concrete requires specialized compaction methods. Traditional vibration isn’t effective and can actually worsen segregation. Instead, focus on mechanical tamping and hand-packing to achieve adequate density.
Utilize a hand tamper – a flat, weighted tool – to systematically compact the dry mix in overlapping passes. Apply firm, even pressure, ensuring complete coverage of the surface. For larger areas, consider a plate compactor without vibration, set to a low intensity.
Pay particular attention to edges and corners, where compaction is most critical. Hand-packing with a 2×4 or similar board can help force the material into these tight spaces. The goal is to create a firm, level base, ready for screeding. Proper compaction minimizes air pockets and maximizes the strength and longevity of the concrete slab.

Finishing and Curing Dry Poured Concrete
After compaction, screed and level the surface, then float and trowel for a smooth finish.
Consistent moisture is vital for proper curing, preventing cracking and maximizing strength.
Screeding and Leveling the Surface
Screeding is a crucial step after the dry concrete mix is distributed and compacted. It establishes a perfectly level surface, serving as the foundation for subsequent finishing operations. Utilize a straight 2×4 board, often referred to as a screed board, and move it across the surface with a sawing motion.
Ensure the screed board spans across formwork or guide rails, maintaining consistent contact with the dry concrete. Apply gentle downward pressure to remove excess material and fill in low spots. Multiple passes may be necessary to achieve a uniformly level plane.
Following screeding, address any minor imperfections or unevenness with a hand tamper or a leveling rake. This meticulous preparation ensures a smooth and consistent base for floating and troweling, ultimately contributing to the durability and aesthetic appeal of the finished concrete surface.
Floating and Troweling Techniques
Floating follows screeding, embedding the large aggregate and removing surface imperfections. Employ a wood or magnesium float, working in overlapping arcs to create a smooth, even texture. This process prepares the surface for troweling and helps to bring cement paste to the surface.
Once the surface has stiffened slightly, begin troweling. Start with a steel trowel, applying firm, even pressure in overlapping passes. Initially, focus on consolidating the surface and closing any remaining voids.
For a smoother finish, transition to a hand or power trowel, making multiple passes with progressively lighter pressure. The goal is to achieve a dense, polished surface free of blemishes. Proper technique is vital; avoid over-troweling, which can weaken the surface.
Curing Methods for Dry Poured Concrete
Curing is crucial for dry poured concrete’s strength and durability. Unlike wet concrete, dry pour requires a different approach to hydration. Immediately after finishing, lightly mist the surface with water, avoiding saturation which can cause segregation.
Covering the concrete with plastic sheeting is highly effective, trapping moisture and promoting consistent hydration. Ensure the plastic is secured to prevent wind uplift. Alternatively, apply a curing compound specifically designed for concrete, forming a membrane that retains moisture.
Maintain consistent moisture for at least 7 days, ideally longer, especially in hot or dry conditions. Regular, gentle misting is preferable to infrequent, heavy watering. Proper curing minimizes cracking and maximizes the concrete’s potential strength.